How to Make a Herbarium: A Beginner’s Step-by-Step Guide
August 4, 2025
A field herbarium is more than a collection of dried plants; it is a structured record of botanical observations that preserves species identity, context, and cultural knowledge for future study. Whether you are an ethnobotanist, a biology student, a conservationist, or a curious naturalist, building an accurate and ethically sourced field herbarium gives you a lasting reference, a scientific baseline, and a way to contribute to broader ecological understanding. This guide explains how to create a field herbarium in a way that balances practicality, ethics, and scientific value—without overwhelming you with jargon or unnecessary checklists.
Planning and Ethical Groundwork
Before stepping into the field, take time to define what your herbarium will represent. A focused scope—such as medicinal plants in a local watershed, urban edible weeds, or traditional plants used by a community—yields more meaningful data than random sampling. Equally important is the ethical dimension: secure permissions for collection when working on protected land or within indigenous territories, and if traditional knowledge is involved, engage locals with transparency. Ask for consent, document sources, and negotiate benefit-sharing or attribution. This builds trust and prevents harm, ensuring your herbarium becomes a respectful bridge between knowledge systems rather than a one-sided extraction.
What You Need: Tools Without Overload
You do not need a laboratory to begin; a compact field kit will serve for most beginner herbaria. Carry a sturdy notebook or pre-formatted data sheets, a means of recording location (GPS device or smartphone), something to photograph the specimen and its surroundings, and simple cutting tools such as pruning shears. For pressing specimens on site, lightweight materials like folded cardboard, absorbent paper (newspaper or blotter if available), and straps or ropes make an improvised press. Waterproof labels or tags and a reliable pen allow you to link physical specimens with field notes. Temporary breathable bags protect fresh material during the day; a small hand lens helps assess diagnostic features. The goal is minimalism: each piece of equipment supports accurate documentation and preservation without adding bulk or complexity.
Collecting Specimens: Attention to Detail in the Field
Successful herbarium work begins with what you choose to collect and how you record it. Select representative parts of the plant—leaves, flowers, fruits, stems, and, when sustainable, a small portion of roots. Avoid removing entire rare individuals; instead, take enough material to show distinguishing features. If the plant is in multiple stages (flowering and fruiting), capture that variation to aid identification later.
As soon as you collect the specimen, assign it a unique collection number and record essential context in your notebook. Include the date, precise location (coordinates and a brief description), habitat characteristics (e.g., shaded hillside, disturbed roadside), elevation, and the plant’s reproductive state. If the plant has a known or reported use in local practice, note this alongside the source and consent status. While continuing your fieldwork, take photographs that show the plant in its environment (the habit), close-ups of key structures, and the broader habitat. These images, tied by collection number, give dimensional clarity that a pressed specimen alone cannot convey.
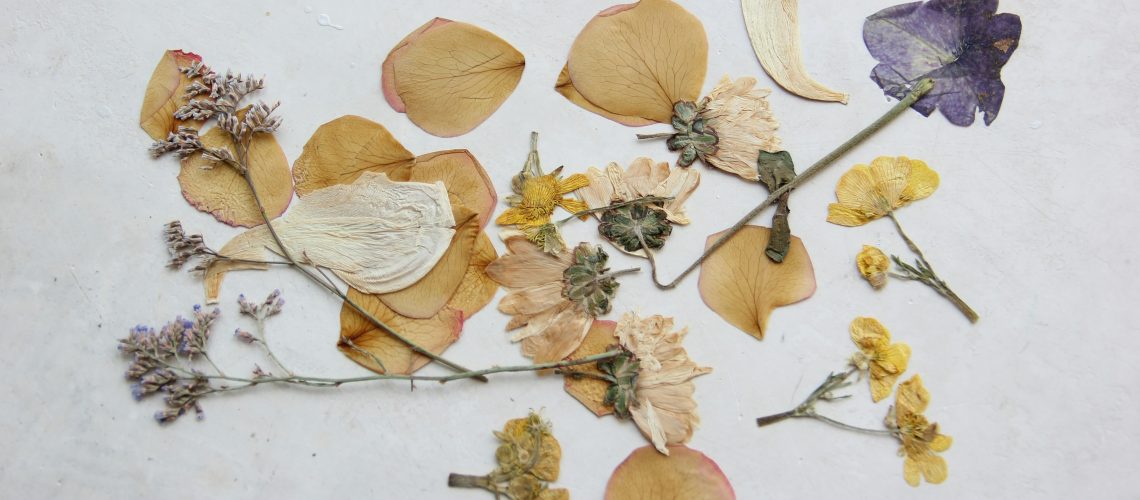
Pressing and Drying with Care
The objective of pressing is to flatten the specimen while preserving its morphological integrity and preventing decay. Lay the plant on absorbent paper, arranging leaves and flowers so key traits are visible. Use small strips of paper or soft supports to gently hold delicate parts in place if needed. Stack these layers within your press material—alternate absorbent layers with stiff backing for even pressure—and tighten the assembly so it compresses without crushing. In the field, change the absorbent layers frequently during the first few days, especially in humid conditions, to avoid mold formation. If drying completely in the field is not feasible, transport the pressed material promptly to a drier environment and finish drying with airflow: indirect heat, fans, or passive ventilation allow moisture to leave without damaging the specimen. Avoid direct sunlight, which can bleach colors and degrade tissues.
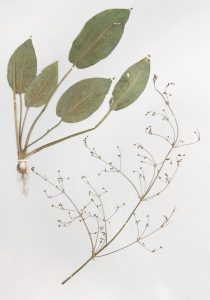
Mounting and Labeling the Dried Specimens
Once the specimen is fully dry, it enters the permanent collection phase. Use archival-quality paper that resists acidification for mounting; this ensures longevity. Affix the plant with minimal but secure methods: narrow strips of archival tape, small adhesive patches of conservation-safe glue, or fine stitching for fragile elements. Each mounted specimen must be accompanied by a complete label detailing its provenance. At minimum, that label should include the collection number, the plant’s scientific name if known (or a provisional identification), common names, collector’s name, date, precise location with coordinates, habitat description, phenological state (e.g., flowering, fruiting), and any ethnobotanical or usage notes with notation on consent. Labels act as the metadata of your specimen: without them, the specimen loses much of its research value.
Cataloging the Collection
After physical preparation, systematize the information digitally to avoid loss and to enable searching, sharing, and future analysis. A simple spreadsheet keyed by the collection number works well for starters; column fields should mirror the label data, with extras like links to associated photographs, identification status (confirmed, tentative, under review), and any notes on later observations or re-analyses. As your collection grows, adopt more structured data practices—consistent naming conventions, version control, and backups. When feasible, integrate your dataset with open-source herbarium management platforms or institutional repositories, always observing ethical constraints on sensitive location or knowledge data.
Storage, Protection, and Longevity
Specimens that are handled and stored poorly degrade rapidly. Keep mounted sheets in a stable, cool, dry environment away from direct light. Use archival folders and protective boxes to shield against dust, insects, and handling wear. New additions should be inspected for pests; a short freeze cycle before incorporation can reduce insect contamination. When accessing specimens, support the entire sheet to prevent creasing; clean hands or gloves help reduce oils transferring to the paper. Occasionally audit your collection for environmental damage, and if necessary, remediate by remounting or improving enclosure conditions.
Digitization and Responsible Sharing
Digitizing specimens multiplies their value. High-resolution imaging captures dorsal and ventral views of leaves, structures obscured in the pressed state, and label information. Embed metadata in file names and image headers, linking back to the collection’s master database. When sharing online—whether for collaborative research, community education, or open access—clearly indicate usage rights, especially for specimens tied to traditional knowledge. In some contexts, obscuring the exact location of rare or culturally sensitive plants protects both ecosystems and local partners. Assigning persistent identifiers or stable URLs to digital records facilitates citation and long-term referencing in publications.
Common Pitfalls and How to Avoid Them
A few recurring problems undermine otherwise careful herbaria: collecting specimens without sufficient contextual data, pressing plants poorly so key traits are obscured, and failing to secure informed consent when traditional uses are involved. Skipping ethical review creates lasting distrust that no amount of scientific rigor can repair. Another frequent issue is degradation due to inadequate drying or use of low-quality materials; investing time in proper initial preparation prevents losses later. Developing a consistent routine—collect, photograph, record, press, label, and catalog—creates a workflow where nothing essential is overlooked.
Long-Term Value and Integration
When ethnobotanical data are included responsibly, a well-constructed field herbarium becomes a baseline for ecological change, a reference for species identification in shifting climates, and a vessel for cultural memory. It allows researchers to revisit past determinations, validate traditional knowledge, and monitor phenological shifts over time. Some projects expand the herbarium’s scope by integrating genetic samples, chemical assays, or oral histories, each layered carefully to preserve integrity. Cross-linking your collection with regional or global databases amplifies its utility while contributing to larger biodiversity and conservation efforts.
Conclusion
Building a field herbarium involves thoughtful selection, deliberate documentation, careful preservation, and ethical stewardship. Beginners can create enduring scientific collections by starting with clear intent, using simple tools wisely, and respecting the people and ecosystems behind the specimens. The value of each sheet extends far beyond the moment of collection: it becomes part of a shared archive of botanical knowledge that informs research, education, and environmental care for years to come.