Ethical Wildcrafting: A Practical Guide to Sustainable Medicinal Plant Harvesting
August 10, 2025
Ethical wildcrafting is the practice of gathering medicinal plants in ways that protect ecosystems, respect local laws, and honor community knowledge. This guide explains how to harvest responsibly—from permits and plant ID to non-destructive techniques, post-harvest handling, and a personal code of ethics—so wild populations remain healthy for generations.
Table of Contents
-
Why Ethical Wildcrafting Matters
-
Know Before You Go: Laws, Permissions, and Risk Assessment
-
Fieldcraft: Identification, Timing, and Non-Destructive Techniques
-
Post-Harvest: Cleaning, Drying, and Traceability
-
Building a Personal Code of Ethics
Why Ethical Wildcrafting Matters
The core idea: take care of the plant and its place, and it will take care of you. Wildcrafting intersects ecology, public safety, and cultural respect. Practiced poorly, it depletes populations, spreads invasive species through careless handling, and erodes community trust. Practiced well, it supports conservation by reducing pressure, encouraging habitat stewardship, and keeping knowledge alive.
Conservation and population health.
Wild medicinal species often have slow growth, specific pollinators, or narrow habitats. Overharvesting the roots of slow-growing perennials, for example, can collapse local stands for a decade. Ethical harvesters treat every patch as finite capital: they never touch rare or threatened species, avoid stands under stress (drought, disease, heavy browsing), and observe multi-year recovery.
Cultural responsibility and reciprocity.
Indigenous peoples and local communities frequently hold knowledge of medicinal plants. Respect begins with consent: ask permission where appropriate, follow community protocols, and share benefits when knowledge or access is granted. Reciprocity can mean labor on restoration days, supplying starts for community gardens, or sharing non-sensitive results from your observations.
Public health and quality.
Ethical practices also protect end users. Proper identification, clean harvesting, and post-harvest handling reduce contamination, adulteration, and potency variability. In short, ethics are not a “nice-to-have”—they are integral to safety, quality, and trust.
Know Before You Go: Laws, Permissions, and Risk Assessment
Start with legality.
Before touching a plant, determine: who owns the land, what’s allowed, and what’s off-limits. Rules differ across public lands, private property, and conservation areas. Some species are fully protected; others allow limited personal use; commercial harvest often requires permits. When in doubt, don’t harvest.
Access and consent.
-
Private land: obtain written permission and clarify limits (species, quantity, season, areas to avoid).
-
Community or Indigenous lands: follow posted protocols; where knowledge is shared, ask how to give back.
-
Trailsides and urban edges: verify harvest rules; avoid areas with heavy pesticide use, runoff, or pet traffic.
Risk assessment.
-
Environmental quality: Avoid contaminated soils (old industrial sites), roadsides with heavy metals, and waterways with algal blooms.
-
Population status: observe patch size, age structure (seedlings to mature plants), and recent disturbances (fire, logging).
-
Harvest intent: are you collecting for personal use, teaching, or small-scale commerce? Scale your impact and documentation accordingly.
Ethical quantities (the “leave-plenty” rule).
A conservative norm is to harvest no more than 10–20% of a healthy, abundant stand—and only if removing that part does not compromise the plant’s survival. If a stand is small or stressed, harvest zero and note the location for monitoring, not taking.
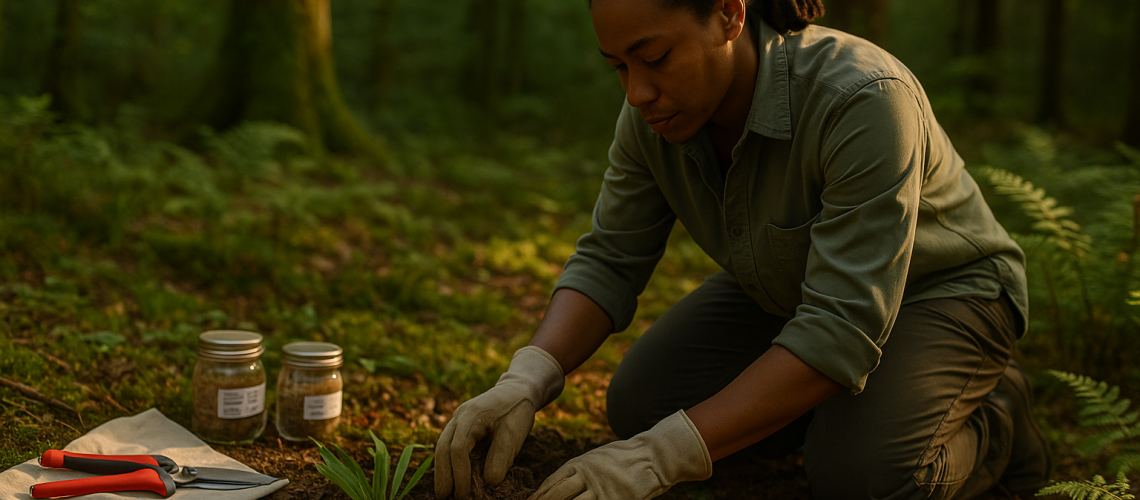
Fieldcraft: Identification, Timing, and Non-Destructive Techniques
Correct identification is non-negotiable.
Misidentification can be dangerous for both people and plants. Combine multiple characters—leaf arrangement, flower/fruit features, odor, habitat, and seasonality. Create a habit of vouchering (pressing a small, legally collected specimen or detailed photographs) to confirm ID later and to improve your personal herbarium records.
Timing for potency and plant health.
-
Leaves: harvest at peak vitality—often pre-flower or early bloom—when oils and actives are rich.
-
Flowers: collect just as they open; skip those with heavy insect activity needed for pollination.
-
Bark: prioritize downed limbs or naturally shed bark; never ring a living tree.
-
Roots and rhizomes: prefer clones that regenerate from fragments; harvest sections rather than the whole crown, and only from robust, established patches.
-
Seeds/fruits: gather a fraction and leave most for wildlife and natural reseeding.
Non-destructive techniques (with examples).
-
Leafy tops: pinch or snip above a node to encourage regrowth; avoid stripping one plant bare—take a little from many, not much from one.
-
Roots: slit the soil carefully with a hori-hori, remove a portion of a spreading rhizome, and replant splits and crowns. Replace soil and leaf litter.
-
Aerial parts on shrubs/trees: cut at an angle above a node using sanitized pruners to prevent disease entry.
-
Mosses, lichens, slow perennials: observe, don’t harvest—rates of regrowth are too slow; choose cultivated sources.
Sanitation and biosecurity.
Clean tools between sites to avoid introducing pathogens and invasive seeds. Brush off boots, wash blades with alcohol, and keep collections separated in breathable bags labeled with species, date, site code, and plant part.
Micro-scale mapping.
Sketch the patch: dominant species, associate plants, canopy cover, slope, moisture, disturbance signs. These notes become your impact ledger—if a patch looks thinner next year, your map helps decide whether to pause harvesting entirely.
Post-Harvest: Cleaning, Drying, and Traceability
Goal: preserve potency, safety, and context from field to jar.
Cleaning and sorting.
Shake off soil in the field; at home, rinse quickly only when necessary and dry surface moisture immediately. Remove damaged, pest-eaten, or discolored parts—sort by size for even drying.
Drying environments.
To protect volatile constituents, aim for low heat, good airflow, and shade. Use mesh racks or paper bags. Record temperature and humidity, especially for aromatic species.
Storage basics.
When fully dry (stems snap, roots break cleanly), store in airtight containers away from light and heat. Label with species, plant part, harvest date, location code, drying method, and batch number.
Simple processing table
| Plant Part | Preferred Drying Method | Target Cues | Common Pitfalls | Notes |
|---|---|---|---|---|
| Leaves/flowers | Air-dry on racks | Crisp, color retained | Overheating → loss of aroma | Turn gently; avoid sun |
| Roots/rhizomes | Sliced, low-heat dehydrator | Snap cleanly | Mold from thick pieces | Slice evenly; pre-dry on racks |
| Barks | Air-dry strips | Slight curl, firm | Ringing live trees | Favor windfall; small, selective cuts |
| Seeds/fruits | Screen drying | Hard, low moisture | Fermentation | Spread thin; stir daily |
Traceability and quality notes.
Keep a batch record linking field notes, photos, and processing details. This establishes accountability, supports teaching, and—if you sell small batches—helps customers understand origin and ethics. Traceability also simplifies recalls if an issue arises.
Building a Personal Code of Ethics
Ethics are a practice, not a checkbox. Below is a compact framework you can adapt for your context, whether you teach, forage for home use, or run a small apothecary.
1) Commitments to Land and Species
-
Conservation first: never harvest threatened or rare species; prioritize abundant natives or invasives where removal helps habitat.
-
Habitat care: pack out trash, scatter leaf litter back over disturbed soil, and avoid trampling cryptogams and seedlings.
-
Rotation: return to a patch no more than once per season; alternate sites; if a site declines, rest it.
2) Commitments to People and Knowledge
-
Consent & reciprocity: seek permission; follow community protocols; ask how to contribute back.
-
Transparency: record exactly what you take and why; share non-sensitive learnings with local groups or students.
-
Safety: If you teach, model best practices, such as tool hygiene, correct ID, dosage caution, and when not to harvest.
3) Sustainable Harvest Planning (Step-by-Step)
-
Define purpose (personal use, class demo, small-batch product).
-
Research the status of the target species regionally; if any doubt, substitute with a cultivated or abundant alternative.
-
Scout multiple sites; pick the healthiest, most abundant stand.
-
Set a strict limit (e.g., ≤10–20% of the stand, or zero if reproduction seems weak).
-
Harvest selectively using non-destructive methods; spread your take across many individuals.
-
Record data (date, GPS or site code, quantity by weight/volume, part taken).
-
Restore micro-disturbance—replace soil, leaf litter, and cover exposed roots.
-
Process promptly and label thoroughly for traceability.
-
Review annually—compare notes and photos; if indicators trend downward, stop harvesting and help the site recover.
4) Quick Ethical Wildcrafting Checklist
-
Right species, right place, right time (ID confirmed, legal access, healthy stand).
-
Minimal impact tools (clean pruners, sharp knife, breathable bags).
-
Selective take (no whole-plant removal unless species readily regenerates, and only from robust patches).
-
Zero rare species and zero stressed stands.
-
Leave the site better: litter picked up, soil covered, trampling minimized.
-
Document and label everything you take.
Putting it all together.
When you slow down to plan your harvest, limit your take, and actively care for sites, you transform wildcrafting into stewardship. This approach yields higher-quality medicine, builds trust with landowners and communities, and—most importantly—keeps wild populations thriving.